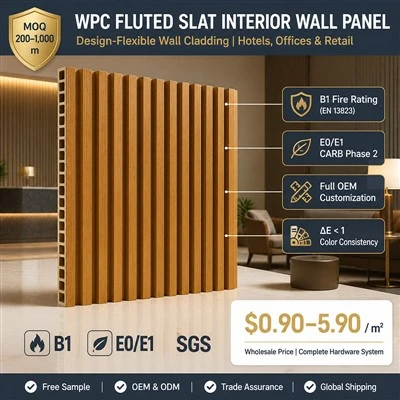
Hey there! I'm a supplier of Clear PVC Wall Panels, and I'm stoked to share with you how to install these awesome panels on a paneled wall. Whether you're looking to spruce up your home or a commercial space, clear PVC wall panels are a great choice. They're durable, easy to clean, and add a modern touch to any room.
What You'll Need
Before we get started, let's go over the tools and materials you'll need for this project. Here's a list to help you out:
- Clear PVC Wall Panels: Of course, you'll need the panels themselves. We offer a variety of options, like 8mm PVC Wall Panels and Black Sparkle PVC Wall Panels. You can also check out our Commercial PVC Wall Panels if you're doing a business installation.
- Measuring Tape: To measure the wall and cut the panels to the right size.
- Utility Knife: For cutting the PVC panels. Make sure it has a sharp blade.
- Straight Edge: This will help you make straight cuts.
- Adhesive: You'll need a good adhesive to stick the panels to the wall. Make sure it's suitable for PVC.
- Caulk Gun: If you're using caulk to seal the edges, you'll need a caulk gun.
- Level: To make sure the panels are installed straight.
- Safety Gear: Gloves and safety glasses are a must to protect yourself during the installation.
Preparing the Wall
The first step is to prepare the paneled wall. This is super important to ensure the panels adhere properly and look great.
- Clean the Wall: Use a mild detergent and water to clean the wall surface. Remove any dirt, dust, grease, or old paint. Rinse the wall thoroughly and let it dry completely.
- Inspect the Wall: Check for any damage or unevenness on the wall. If there are any holes or cracks, fill them with spackle or a suitable filler. Sand the filled areas smooth once they're dry.
- Measure the Wall: Use a measuring tape to measure the height and width of the wall. Write down these measurements so you know how many panels you'll need and how to cut them.
Cutting the Panels
Now that the wall is ready, it's time to cut the PVC panels to size.
- Mark the Panels: Lay the panel on a flat surface and use a measuring tape and a straight edge to mark the cutting line. Make sure the mark is clear and accurate.
- Cut the Panels: Use a utility knife to cut along the marked line. Score the panel several times to make a deep cut. Then, bend the panel along the scored line to break it. If the panel is thick, you may need to use a saw instead.
- Test the Fit: Place the cut panel against the wall to check the fit. Make any necessary adjustments by trimming the edges.
Installing the Panels
It's finally time to install the panels on the wall.
- Apply Adhesive: Apply a thin, even layer of adhesive to the back of the panel using a trowel or a putty knife. Make sure to cover the entire surface, but don't use too much adhesive.
- Position the Panel: Carefully place the panel against the wall, starting from the bottom. Use a level to make sure the panel is straight. Press the panel firmly against the wall to ensure good adhesion.
- Secure the Panel: Use clamps or tape to hold the panel in place while the adhesive dries. Follow the manufacturer's instructions for the drying time.
- Install the Next Panel: Repeat the process for the next panel. Make sure to align the panels properly and leave a small gap between them for expansion.
- Seal the Edges: Once all the panels are installed, use caulk to seal the edges. This will prevent water and dirt from getting behind the panels. Use a caulk gun to apply the caulk in a smooth, even line. Smooth the caulk with a putty knife or your finger.
Finishing Touches
After the panels are installed and the caulk is dry, give the wall a final inspection.
- Clean the Panels: Use a damp cloth to clean the panels and remove any excess adhesive or caulk.
- Check the Installation: Make sure all the panels are securely attached and there are no gaps or unevenness. If you find any issues, make the necessary repairs.
Why Choose Our Clear PVC Wall Panels
Our clear PVC wall panels are top - notch. They're made from high - quality materials, so they're strong and long - lasting. They're also easy to maintain. Just wipe them down with a damp cloth, and they'll look as good as new. Plus, they come in different styles and sizes to fit your specific needs.
Contact Us for More
If you're interested in our clear PVC wall panels or have any questions about the installation process, don't hesitate to reach out. We're here to help you with your project, whether it's a small home update or a large commercial installation.

References
- "PVC Wall Panel Installation Guide" - Generic DIY Home Improvement Manual
- Manufacturer's Instructions for Clear PVC Wall Panels